Mold on sheetrock can affect the appearance, condition, and indoor air quality of a home. Sheetrock, commonly known as drywall or gypsum board, is used to create interior walls and ceilings. Although it provides a smooth surface for painting and decorating, its paper facing and gypsum core can absorb moisture, making it vulnerable to mold growth when damp conditions persist.
Homeowners may notice mold after a plumbing leak, roof leak, basement flood, or period of poor ventilation. In some cases, the growth appears as small dark spots on painted drywall. In others, it develops behind wallpaper, near windows, inside cupboards, or around bathroom ceilings.
Knowing how to kill mold on drywall requires more than applying a cleaning product. The surface condition, moisture level, affected area, and depth of contamination all influence the appropriate treatment. Small areas of superficial growth may be manageable, but damp or damaged drywall often needs to be removed and replaced.
What Causes Mold on Drywall?
Mold is a type of fungus that grows when moisture and suitable organic material are available. The paper covering on drywall can provide a surface for mold growth, while dust and other organic particles can also support it.
Several conditions can contribute to mold on sheetrock.
Water leaks
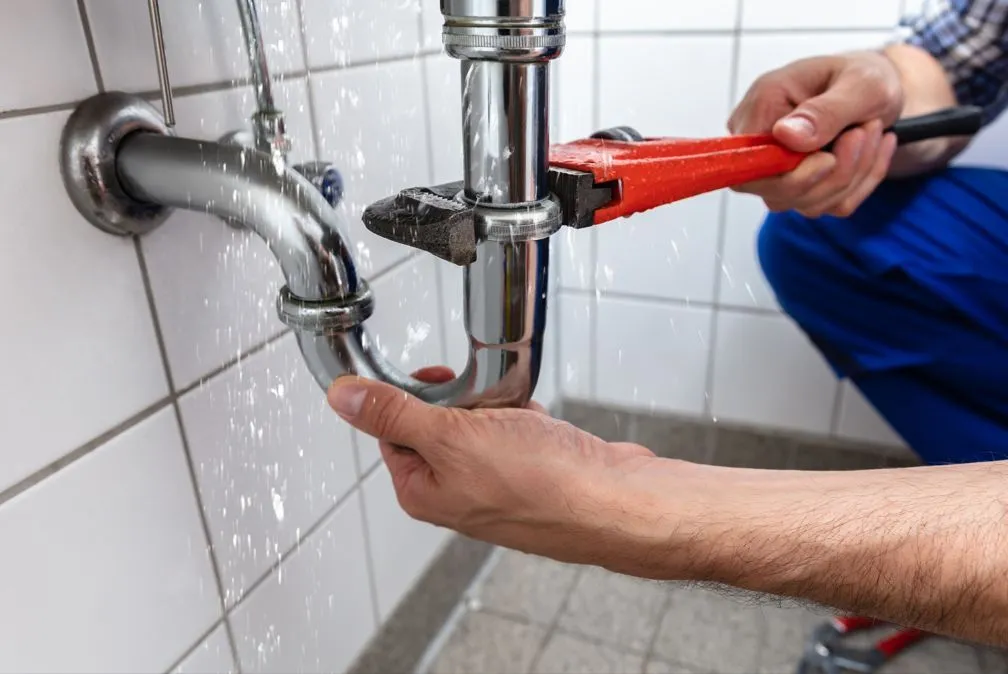
Leaking pipes, damaged roof coverings, faulty plumbing connections, and overflowing appliances can allow water to enter walls and ceilings. Even a small leak can create a persistent damp area if it remains undetected.
High indoor humidity
High humidity can encourage condensation on cold walls, windows, and ceilings. This is particularly common in bathrooms, kitchens, basements, and poorly ventilated bedrooms.
Poor ventilation
Cooking, showering, bathing, and drying laundry release moisture into indoor air. When this moisture cannot escape, it may collect on cool surfaces and encourage mold growth.
Flooding and water damage
Floodwater can soak drywall, insulation, timber framing, and floor coverings. Because these materials may retain moisture after the visible water has disappeared, mold can develop inside wall cavities.
Condensation around windows and exterior walls
Cold spots, inadequate insulation, thermal bridging, and poorly sealed windows can contribute to condensation. Repeated moisture exposure may eventually cause mold to develop on painted sheetrock.
The US Environmental Protection Agency (EPA) recommends controlling moisture as the central part of mold prevention. Cleaning the visible growth without correcting the source of water is unlikely to provide a lasting solution.
How to Get Rid of Mold on Sheetrock
The correct treatment depends on whether the mold is limited to the surface or has affected the drywall itself. Before choosing a mold-killing solution for drywall, assess the damage and determine whether the material is still firm, dry, and structurally sound.
1. Identify and Repair the Moisture Source
Begin by looking for the reason the drywall became damp. Check nearby plumbing, window frames, roof areas, bathroom fixtures, exterior walls, and basement foundations.
If a leak is responsible, arrange the necessary repair before completing the cleanup. If condensation is the problem, investigate ventilation, indoor humidity, insulation, and cold surfaces.
Do not assume the problem is solved simply because the wall feels dry to the touch. Moisture can remain behind the surface or inside the wall cavity.
2. Assess the Condition of the Drywall
Inspect the affected sheetrock carefully. Look for discoloration, peeling paint, swollen edges, crumbling gypsum, soft patches, or a persistent musty smell.
Drywall that remains firm and has only a small amount of superficial growth may be suitable for limited cleaning, depending on the circumstances. However, moldy drywall that has absorbed substantial water or developed extensive contamination may need replacement.
The EPA explains that mold can penetrate porous materials, making complete removal difficult or impossible. This is why treating the surface alone is not always sufficient.
3. Wear Suitable Protective Equipment
Before cleaning a small affected area, protect yourself against contact with mold and cleaning products.
Appropriate precautions may include:
- Gloves that resist the cleaning product being used.
- Protective goggles that limit exposure to splashes and particles.
- A properly fitted N95 respirator for suitable small-scale cleanup, where appropriate.
- Clothing that can be washed after the work.
People with asthma, significant allergies, chronic lung conditions, or weakened immune systems should avoid undertaking mold removal themselves. Keep children and other occupants away from the affected area during cleanup.
Avoid dry brushing, sanding, or aggressive scrubbing, which can disturb mold and spread particles into the air.
4. Choose an Appropriate Cleaning Method
For a small area of surface mold on sound, intact drywall, use a method suitable for the surface and the product manufacturer’s instructions.
A mild detergent solution may be appropriate for some surface contamination, but drywall is more absorbent than materials such as glass, metal, or ceramic tile. Applying excessive liquid can introduce additional moisture into the wall.
Use a lightly dampened cloth or sponge only where the surface can be cleaned safely. Avoid soaking the paper facing, and dry the area promptly.
If the mold cannot be removed without damaging the drywall, or if discoloration and musty odors remain, stop and reassess whether replacement is necessary.
5. Dry the Area Thoroughly
Drying is an essential part of mold treatment. Use suitable ventilation, a dehumidifier, or other drying equipment to reduce moisture, provided the equipment can be operated safely.
Address any damp insulation, hidden leaks, or wet building materials that may be maintaining the problem. A dry surface does not guarantee that the inside of the wall is dry.
Do not repaint or apply wallpaper until the underlying moisture issue has been corrected and the material is completely dry.
What Is the Best Mold-Killing Solution for Drywall?
The best mold-killing solution for drywall depends on the material’s condition and the extent of the growth. No liquid treatment can reliably restore every piece of mold-contaminated drywall.
Mild detergent solution
A small amount of suitable household detergent mixed with water may help remove superficial dirt and mold from some intact surfaces. Use minimal moisture and follow the product instructions.
This approach is not a substitute for removing drywall that is extensively contaminated or water-damaged.
Commercial mold and mildew cleaner
Products labelled for mold and mildew removal may be suitable for certain surfaces. Check the label carefully to confirm whether the product can be used on painted drywall or gypsum board.
Some cleaners are designed for non-porous materials and may be unsuitable for absorbent wall surfaces. Always follow the specified application method, ventilation requirements, and contact time.
Bleach-based products
Bleach is often discussed as a way to kill mold, but it is not automatically the best choice for sheetrock. Drywall is porous, and surface treatment may not reach mold inside the material. Applying excessive liquid can also worsen moisture problems.
The US Centers for Disease Control and Prevention (CDC) provides guidance on using bleach safely for certain household mold cleanup tasks. However, homeowners should not assume that a bleach solution will make deeply contaminated drywall safe to keep.
Never mix bleach with ammonia, acids, vinegar, or other cleaning products. Dangerous fumes can result. Use a product only for surfaces and applications permitted by its label.
Mold-resistant primer and paint
Mold-resistant coatings may help reduce future surface growth when used as part of a suitable repair. They do not remove existing contamination or correct leaks, condensation, or hidden moisture.
Apply primer and paint only after the affected surface has been properly cleaned, dried, and assessed. If the drywall is damaged or contaminated internally, replacement may be necessary before refinishing.
How to Kill Mold on Drywall Without Removing It
Homeowners often want to know whether they can kill mold on drywall without cutting out the affected section. The answer depends on the depth of contamination and the condition of the material.
Limited surface growth on intact, dry drywall may sometimes be cleaned without replacement. The area should be small, accessible, and free from signs of significant water damage. Cleaning must not create additional moisture or spread contamination.
However, keeping the drywall is generally not appropriate when it is:
- Soft, swollen, crumbling, or visibly deteriorated.
- Wet for an extended period.
- Affected by extensive or recurring mold growth.
- Contaminated by sewage or floodwater of uncertain quality.
- Associated with a persistent musty odor suggesting hidden growth.
The EPA’s mold remediation guidance identifies porous materials such as wallboard as difficult to clean completely when mold has penetrated them. If the affected material cannot be reliably cleaned and dried, removing it is often the more dependable option.
Do not cut into walls or ceilings without considering concealed electrical wiring, plumbing, insulation, and other hazards. Extensive work should be assessed by a qualified mold remediation or water-damage professional.
How to Remove Mold from Drywall That Needs Replacement
When mold has penetrated the sheetrock, removal and replacement may be necessary. This process can involve more than cutting away the visible patch.
First, identify the source of moisture and arrange repairs. The affected area should then be assessed to determine how much drywall, insulation, or other material needs to be removed.
During removal, appropriate containment and protective equipment help limit the spread of mold particles and dust. The work area should be separated from unaffected rooms where necessary, and contaminated materials should be handled and disposed of safely.
Once the damaged drywall has been removed, inspect the wall cavity. Timber framing, insulation, plumbing connections, and exterior wall components may also have been affected.
Clean and dry salvageable materials using methods appropriate to their condition. Replace materials that cannot be adequately cleaned or restored. New drywall should only be installed after the moisture source has been corrected and the cavity is sufficiently dry.
For substantial contamination, professional remediation is advisable. Contractors should assess the source of moisture, establish the appropriate work area, manage contaminated materials, and verify that the underlying problem has been resolved.
When Should You Hire a Mold Remediation Professional?
Professional assistance is particularly important when mold covers a large area, returns repeatedly, or appears to extend behind walls or ceilings.
The EPA commonly uses approximately 10 square feet as a practical threshold for considering the scale of a mold cleanup project. This is a screening guideline rather than a universal safety boundary. The water source, material type, location, and occupants’ health risks also matter.
Consider professional assessment when:
- Mold affects a large section of a wall or ceiling.
- The drywall has been soaked by flooding or a prolonged leak.
- Mold is present inside wall cavities or ventilation systems.
- The water may contain sewage or other contaminants.
- The source of moisture is unclear.
- Occupants have health concerns or increased sensitivity to mold.
In the UK, people dealing with damp and mould can also consult local authority housing guidance and qualified damp surveyors or remediation contractors. In the USA, relevant resources include the EPA, CDC, and local public health or building authorities.
How to Prevent Mold from Returning on Sheetrock
Preventing recurring mold requires controlling moisture and maintaining the building envelope.
Improve ventilation
Use bathroom and kitchen extractor fans where available, and make sure they discharge appropriately. Ventilation can help remove moisture generated by everyday activities.
Control indoor humidity
A dehumidifier may help in damp basements and other moisture-prone rooms. Monitor indoor humidity and investigate persistent condensation rather than relying on a dehumidifier alone.
Repair leaks promptly
Inspect plumbing, roofs, gutters, window seals, and exterior walls. Address water entry as soon as it is identified.
Dry water-damaged materials quickly
Following a leak or flood, begin safe drying as soon as possible. The CDC advises cleaning and drying a home fully and quickly, ideally within 24–48 hours after flooding, to help reduce mold growth. This timeframe is a prevention target, not a guarantee that mold will not develop.
Keep furniture away from cold walls
Leaving space between furniture and exterior walls can improve airflow and help identify condensation before it causes extensive damage.
Use suitable materials during repairs
Mold-resistant drywall and appropriate primers may be useful in certain moisture-prone areas. However, they do not make a wall waterproof or eliminate the need for ventilation and leak prevention.
Frequently Asked Questions
How do I kill mold on drywall?
For small amounts of superficial mold on intact drywall, an appropriate cleaning method may be sufficient. Avoid soaking the material, dry it thoroughly, and correct the moisture source. If mold has penetrated the drywall or the material is damaged, replacement may be necessary.
Can vinegar remove mold from sheetrock?
Vinegar is sometimes used for household cleaning, but it should not be considered a reliable treatment for mold that has penetrated porous drywall. Using additional liquid may also worsen dampness. Choose a product suitable for the surface and assess whether the drywall can be safely retained.
Can I paint over mold on drywall?
No. Painting directly over mold does not remove the contamination or solve the moisture problem. Paint may peel, and mold can return if damp conditions continue. Clean or replace the affected material, correct the moisture source, and allow the area to dry before repainting.
Does black mold on sheetrock always require replacement?
Not necessarily. Colour alone cannot identify the mold species or determine how deeply it has penetrated the material. The extent of growth, moisture exposure, and physical condition of the drywall are more useful factors when deciding whether cleaning or replacement is appropriate.
How can I tell if mold is behind drywall?
A persistent musty smell, recurring surface mold, water stains, peeling paint, or unexplained dampness may indicate hidden growth. These signs are not conclusive on their own. A qualified professional can assess the wall and determine whether further inspection is needed.
Is mold on drywall dangerous?
Mold exposure can cause allergic reactions and respiratory symptoms, and it may worsen asthma in some people. Health effects vary, and colour or appearance cannot establish the level of risk. Avoid disturbing significant growth and seek professional advice when the contamination is extensive or occupants have health concerns.
Conclusion
Knowing how to get rid of mold on sheetrock begins with understanding the difference between superficial growth and contamination that has penetrated the drywall. A small affected area on sound material may sometimes be cleaned, but wet, crumbling, swollen, or extensively moldy drywall often needs to be removed and replaced.
The most important step is to correct the source of moisture. Leaks, condensation, poor ventilation, and flooding can all create conditions for mold to return if they remain unresolved. Use suitable protective equipment, avoid spreading mold during cleanup, and seek professional assistance when contamination is extensive or hidden.
For homeowners in the USA and UK, a lasting solution combines appropriate mold removal, thorough drying, moisture control, and repairs that protect the building from future water damage.