
The engine coolant temperature (ECT) sensor is a small but critical component in modern vehicles. It monitors the temperature of the engine’s coolant and sends data to the vehicle’s engine control unit (ECU). That information helps manage fuel injection, ignition timing, emissions, and even the cooling fan operation.
Table of Contents
ToggleIf you are searching for how to replace coolant sensor, how to replace the engine coolant temperature sensor, or how to change coolant temperature sensor, this detailed article explains the process in clear, practical terms. The information is written for vehicle owners in the USA who want to understand coolant sensor replacement before attempting the repair or speaking with a technician.
What Is an Engine Coolant Temperature Sensor?
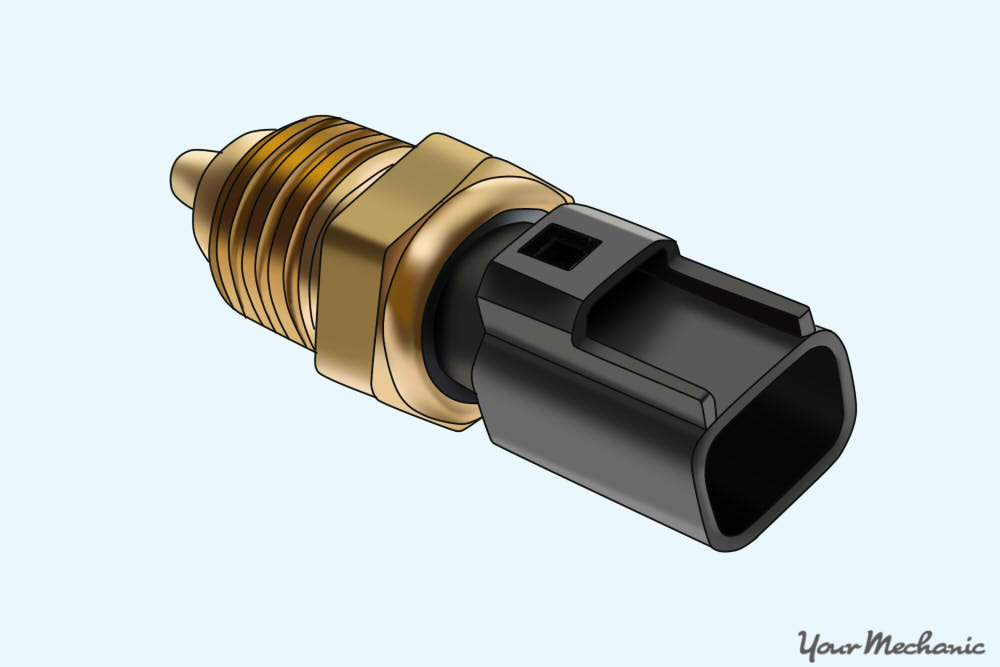
The engine coolant temperature sensor (often called the ECT sensor or coolant temp sensor) measures the temperature of the antifreeze mixture circulating through the engine block and radiator. It is typically threaded into the cylinder head, intake manifold, or near the thermostat housing.
The sensor sends temperature readings to the vehicle’s computer. In many modern vehicles, including models from Ford Motor Company, General Motors, Toyota Motor Corporation, and Honda Motor Co., Ltd., the ECT sensor plays a major role in:
-
Air-fuel ratio adjustment
-
Cold start performance
-
Radiator fan control
-
Emissions system regulation
-
Dashboard temperature gauge readings
Without accurate temperature data, the engine may not run efficiently.
Signs You May Need Coolant Sensor Replacement
Before learning how to replace a coolant temperature sensor, it is important to recognize the symptoms of a failing sensor.
Common warning signs include:
-
Check engine light illuminated
-
Poor fuel economy
-
Hard starting, especially when cold
-
Engine overheating or running too cool
-
Black exhaust smoke (rich fuel mixture)
-
Erratic temperature gauge readings
Diagnostic trouble codes (DTCs) such as P0115, P0116, P0117, or P0118 may appear during an OBD-II scan. These codes relate to engine coolant temperature circuit problems.
If these issues appear, replacing the engine coolant sensor may restore proper engine performance.
Where Is the Coolant Temperature Sensor Located?


The location of the coolant temperature sensor depends on the vehicle make and engine design. In most cars and light trucks sold in the United States, it is found:
-
Near the thermostat housing
-
On the cylinder head
-
In the intake manifold
-
Close to the upper radiator hose connection
Some engines use more than one coolant sensor. One sensor may control the dashboard gauge, while another communicates with the ECU.
Consult a repair manual specific to your vehicle for exact positioning before beginning the replacement process.
Tools and Materials Needed
If you are preparing for coolant sensor replacement, gather the following tools:
-
Socket wrench set
-
Deep socket (commonly 19mm or 21mm, depending on vehicle)
-
Ratchet extension
-
Torque wrench
-
Drain pan
-
Replacement coolant sensor
-
New O-ring or sealing washer (if applicable)
-
Thread sealant (if required by manufacturer)
-
Fresh coolant (antifreeze mixture)
Always confirm the correct replacement part by matching it to your vehicle’s year, make, model, and engine size.
Safety Precautions Before Replacing a Coolant Sensor
Working on the cooling system requires caution. Engine coolant can become extremely hot and pressurized.
Follow these safety steps:
-
Allow the engine to cool completely.
-
Disconnect the negative battery cable.
-
Wear safety gloves and eye protection.
-
Avoid opening the radiator cap when the engine is hot.
Hot coolant can cause severe burns. Wait at least 30–60 minutes after driving before beginning the repair.
How to Replace the Engine Coolant Temperature Sensor
The process for how to replace engine coolant sensor is generally straightforward. However, small variations exist depending on the vehicle.
Step 1: Disconnect the Battery
Remove the negative terminal to prevent electrical shorts while disconnecting the sensor.
Step 2: Drain Some Coolant
Place a drain pan under the radiator. Drain enough coolant so the level drops below the sensor location. This helps prevent excessive coolant loss when removing the old sensor.
You do not always need to drain the entire cooling system.
Step 3: Locate the Coolant Sensor
Identify the ECT sensor using a repair manual or visual inspection. It will have an electrical connector attached to it.
Step 4: Disconnect the Electrical Connector
Press the release tab and gently pull the connector off the sensor. Inspect the wiring for corrosion or damage.
Step 5: Remove the Old Sensor
Use a deep socket and ratchet to loosen and remove the sensor. Turn counterclockwise. Some coolant may leak out; this is normal.
Step 6: Install the New Coolant Sensor
This is the stage many people search for when asking how to install engine coolant temperature sensor.
-
Compare the new sensor with the old one.
-
Install a new O-ring if required.
-
Apply thread sealant only if specified by the manufacturer.
-
Thread the new sensor in by hand to avoid cross-threading.
-
Tighten to manufacturer torque specifications.
Overtightening can damage aluminum engine components.
Step 7: Reconnect the Electrical Connector
Push the connector back onto the sensor until it clicks securely into place.
Step 8: Refill Coolant
Refill the radiator or coolant reservoir with the correct antifreeze mixture. Many vehicles in the United States use a 50/50 mix of ethylene glycol coolant and distilled water.
Step 9: Reconnect Battery and Test
Reconnect the negative battery terminal. Start the engine and allow it to reach operating temperature.
Check for:
-
Coolant leaks
-
Stable temperature gauge readings
-
No check engine light
If necessary, use an OBD-II scanner to clear stored trouble codes.
How to Change a Coolant Sensor Without Draining the System
Some experienced technicians replace the sensor quickly to minimize coolant loss. This involves:
-
Removing the old sensor
-
Quickly installing the new one
However, this method can result in coolant spills and air entering the system. For most vehicle owners, partially draining the coolant is the safer option.
Common Mistakes During Coolant Temperature Sensor Replacement
Understanding common errors helps ensure a successful repair.
1. Replacing the Wrong Sensor
Some vehicles have both a coolant temperature sender and an ECT sensor. Confirm you are replacing the correct unit.
2. Ignoring Air Pockets
Air trapped in the cooling system can cause overheating. Proper bleeding procedures may be necessary.
3. Using Incorrect Coolant
Different manufacturers specify different coolant formulations. Using the wrong type can damage the radiator, heater core, or water pump.
4. Over-Tightening the Sensor
Aluminum engine components can strip easily. Always use a torque wrench when possible.
Cost of Coolant Sensor Replacement in the USA
The cost varies depending on vehicle type and labor rates.
Typical price ranges in the United States:
-
Sensor part: $20–$75
-
Labor cost: $80–$200
-
Total repair cost: $100–$300
Luxury or performance vehicles may cost more. Vehicles from brands like BMW or Mercedes-Benz Group may require specialized tools or additional labor time.
Performing the repair yourself reduces labor expenses but requires mechanical knowledge and proper tools.
How Long Does It Take to Replace a Coolant Temperature Sensor?
For most vehicles, coolant sensor replacement takes:
-
30 minutes to 1 hour for experienced individuals
-
1–2 hours for beginners
Access difficulty significantly affects repair time. Some engines require removing air intake components or engine covers.
Why the Engine Coolant Temperature Sensor Is Important
The ECT sensor directly affects fuel delivery. When the engine is cold, the ECU enriches the fuel mixture. As the engine warms, the fuel mixture becomes leaner.
If the sensor fails:
-
The engine may run too rich (wasting fuel)
-
Emissions may increase
-
Spark plugs may foul
-
Catalytic converter damage may occur
Proper coolant sensor replacement helps maintain fuel efficiency, emissions compliance, and engine longevity.
When to Replace vs. When to Test
Before replacing the coolant sensor, it may be tested using:
-
OBD-II live data readings
-
Multimeter resistance testing
-
Comparing readings to manufacturer specifications
Sometimes wiring issues or connector corrosion mimic sensor failure. Proper diagnosis prevents unnecessary parts replacement.
Environmental Considerations
Engine coolant contains chemicals harmful to pets, wildlife, and groundwater. Always:
-
Collect drained coolant in a sealed container
-
Dispose of it at an approved recycling center
-
Avoid pouring coolant down drains or onto the ground
Many auto parts stores in the United States accept used antifreeze for recycling.
Final Thoughts on Replacing a Coolant Sensor
Understanding how to replace a coolant temperature sensor allows vehicle owners to make informed decisions about maintenance and repairs. While the procedure is typically straightforward, attention to safety, proper tools, and correct installation techniques is essential.
Whether you are researching how to change a coolant sensor, how to replace engine coolant temperature sensor, or planning a full coolant sensor replacement, careful preparation improves results.
If you are uncertain about the diagnosis or uncomfortable working with engine components, consulting a certified automotive technician is always a practical option. Properly functioning cooling system components help ensure safe engine operation, stable temperatures, and reliable performance across all driving conditions in the United States.
Maintaining the cooling system—including the radiator, thermostat, water pump, and engine coolant temperature sensor—supports long-term vehicle durability and efficient operation.